Promotional videos have emerged as the most effective means of business for small or large businesses. They capture attention, communicate brand personality, highlight products or services, and assist in converting visitors to customers. But creating high-quality videos doesn't need a heavy budget or an advanced editing suite.
Meet CapCut Desktop Video Editor, a free and feature-packed video editing software that's fast becoming the favorite of creators, entrepreneurs, and marketers alike. With its simple-to-use interface and extensive features list, creating jaw-dropping promotional videos not only becomes a reality, but incredibly effortless. CapCut also supports creative tools like text to speech, which allows you to convert written content into natural-sounding audio, perfect for quick narration when you don't have time to record.
Whether you are a solopreneur trying to market your service, a business owner releasing a product, or a marketing team member wanting quick and quality content, this tutorial will take you through how to use CapCut Desktop to generate professional-looking promotional videos in just five easy steps.
Why Use CapCut Desktop for Business?
CapCut used to be famous for short-form mobile editing, but its desktop version now brings heat for business use. Here's why it's a perfect addition to your marketing arsenal:
Free to use without watermarks
Simple drag-and-drop interface
Extensive range of templates, effects, transitions, and text styles
Integrated access to stock footage, music, and animations
Quick rendering, even on mid-range computers
Above all, CapCut enables you to create professional-quality promotional videos without having to recruit a pro editor or learn time-consuming software like Premiere Pro. It even includes intelligent features such as an AI video generator, helping speed up your workflow by recommending video structures or auto-editing sequences based on your uploaded assets.
Step 1: Begin a New Project and Import Your Media
Let's dive into the workflow. Everything starts with the collection of your media and establishing your workspace.
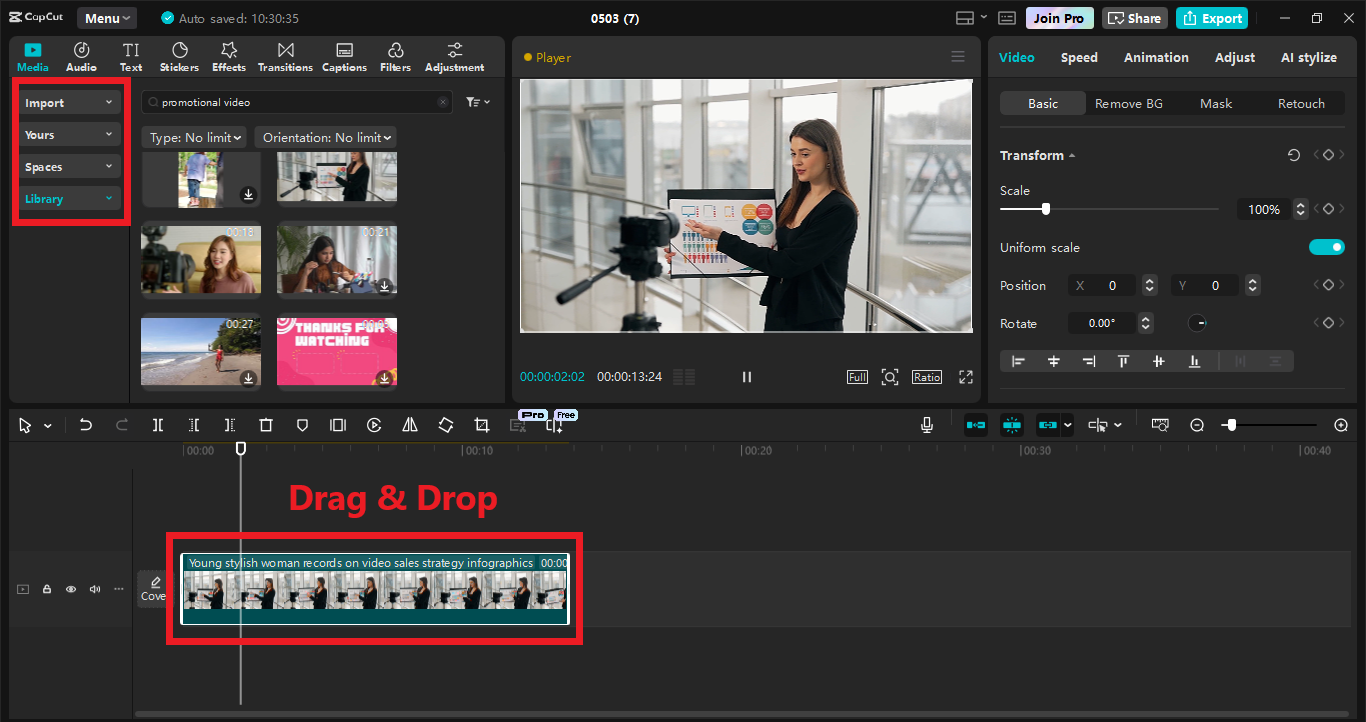
After opening the software, tap "New Project" to initiate an empty timeline. Import your business logo, product videos, photos, screen recordings, or testimonials by tapping "Import" at the top-left corner. You can also drag and drop files into CapCut.
If you don't have your own footage, CapCut also has a free media library with clips and images that are suitable for most industries, from food and beauty to fitness and tech. Organize your clips on the media panel. Name them (e.g., "Intro", "Testimonial", "Product Shot") so you can keep track as you create your video.
Step 2: Create Your Story with a Defined Framework
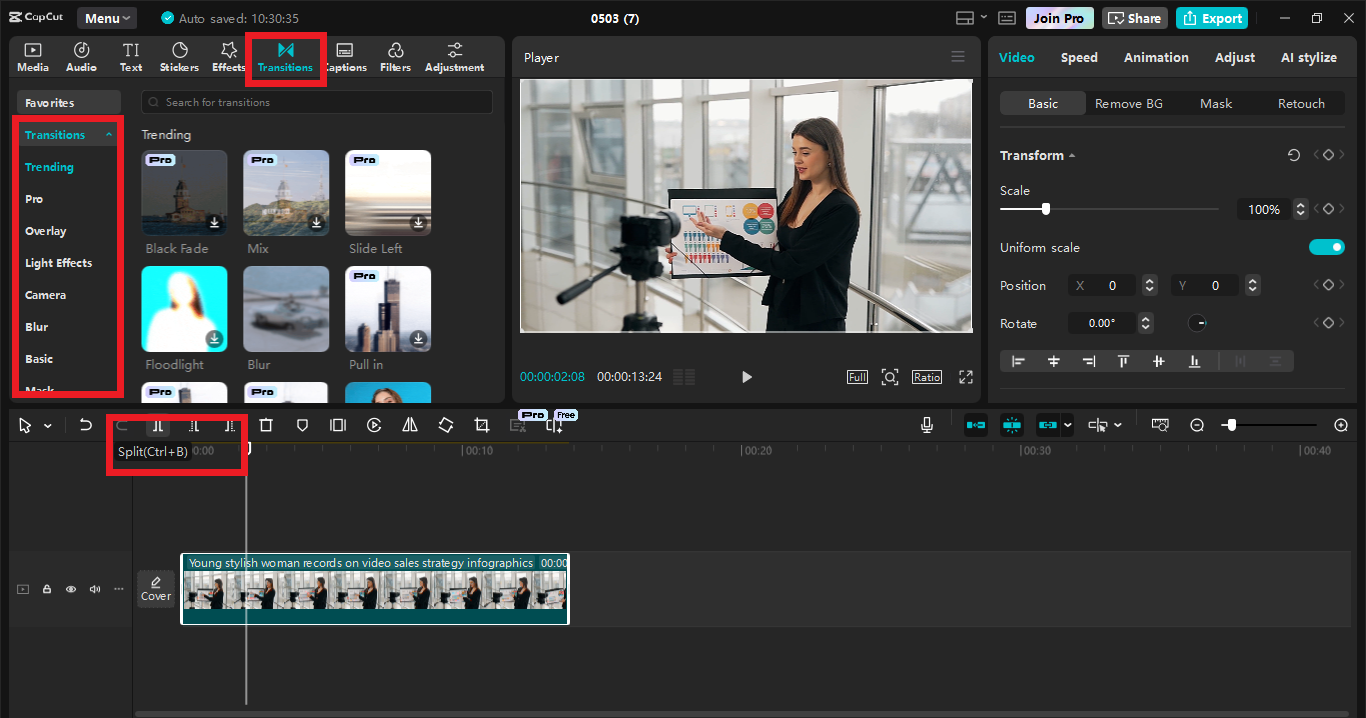
A good promo video has a story a story that begins with a hook, creates interest, and concludes with a defined call to action (CTA). In CapCut Desktop Video Editor, drag clips to the timeline in sequence. Use the Split tool (Ctrl + B) to cut clips and remove unnecessary sections. Add transitions between segments for a smoother flow (from the "Transition" tab). You can also drop in text overlays for product names, slogans, or stats using CapCut’s text tools. Be sure to use your branded colors and fonts if available.
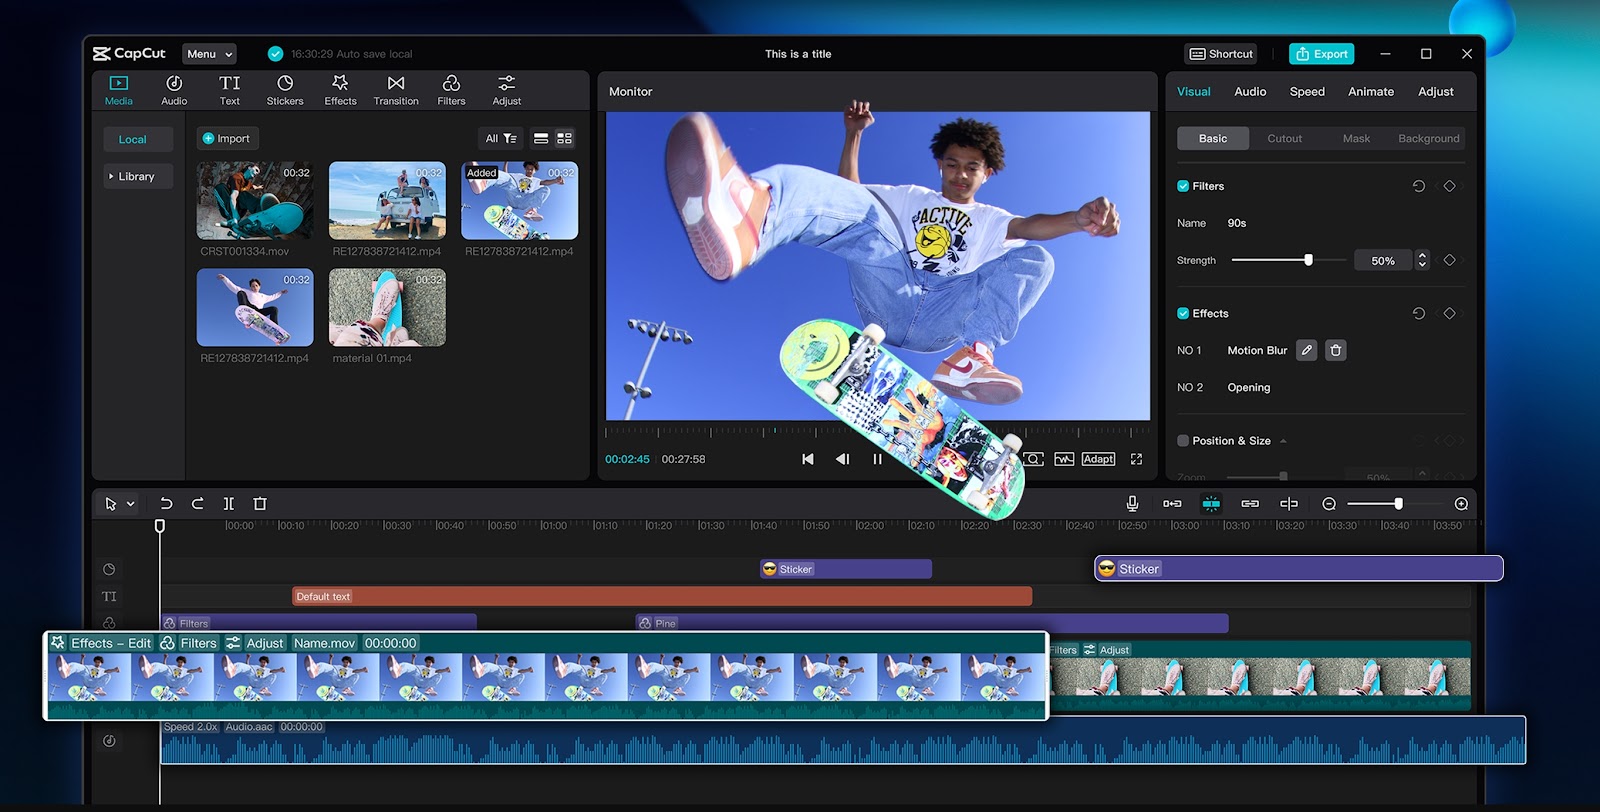
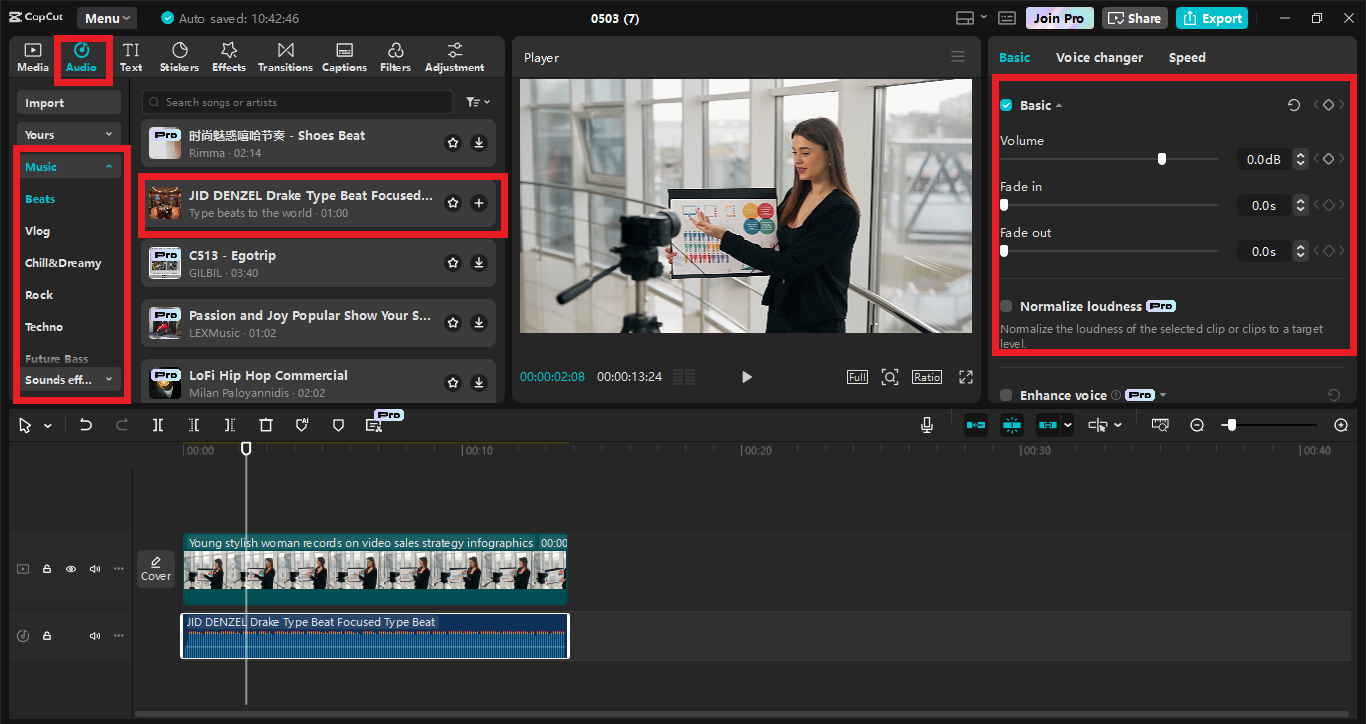
Step 3: Customize with Effects, Text, and Branding
This is where your video comes into focus visually. CapCut provides you with all the essentials to brand and make your video pretty without boggling you. Include your logo and drag it on the timeline, then resize it and place it in the preview window—normally, top-right or bottom corner. You can use the duration bar on the timeline to decide how long it lasts.
CapCut supports complete font, size, color, and motion effect customization. If you have a brand style guide, use these for visual consistency. CapCut has royalty-free music available under the "Audio" tab. Select a background track that suits your video's tone energetic for product launches, relaxed for services, etc. Balance volume levels so that the music doesn't overwhelm your narration or text. To add a bit of flair, you might even consider using a voice changer effect, which can alter the tone of your audio for comedic, dramatic, or brand-specific delivery.
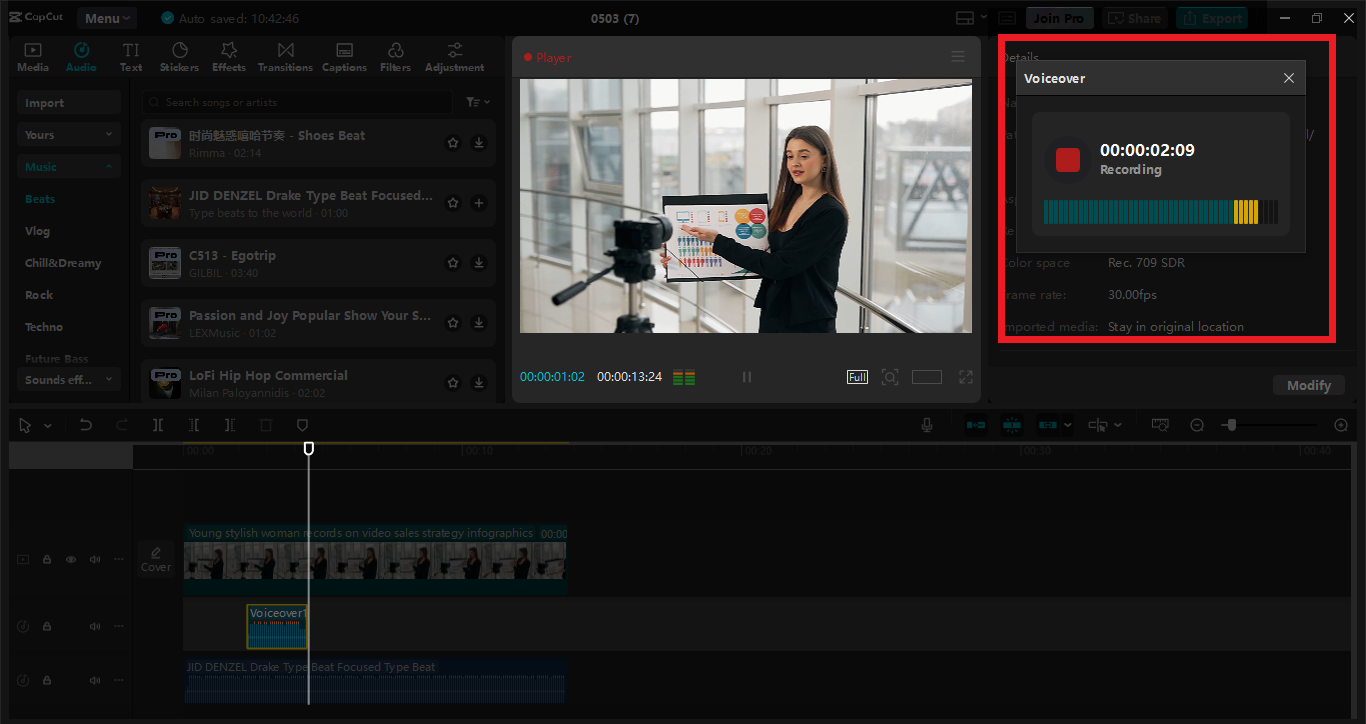
Step 4: Add Voiceovers, Subtitles, and Final Edits
A voiceover can bring life and personality to your promotional video, especially if you’re explaining features or narrating a brand story. You can do voiceovers in CapCut or add pre-recorded narration. Sync the audio on the timeline to the corresponding video clip.
To make your video accessible and mobile-friendly, include subtitles by utilizing CapCut's built-in subtitle tool. You can correct them for accuracy and set the font, size, and position. Play your video from start to finish. Adjust the pacing where necessary. Make sure every second counts trim long pauses or repetitive shots. Aim for around 30 to 60 seconds for maximum engagement.
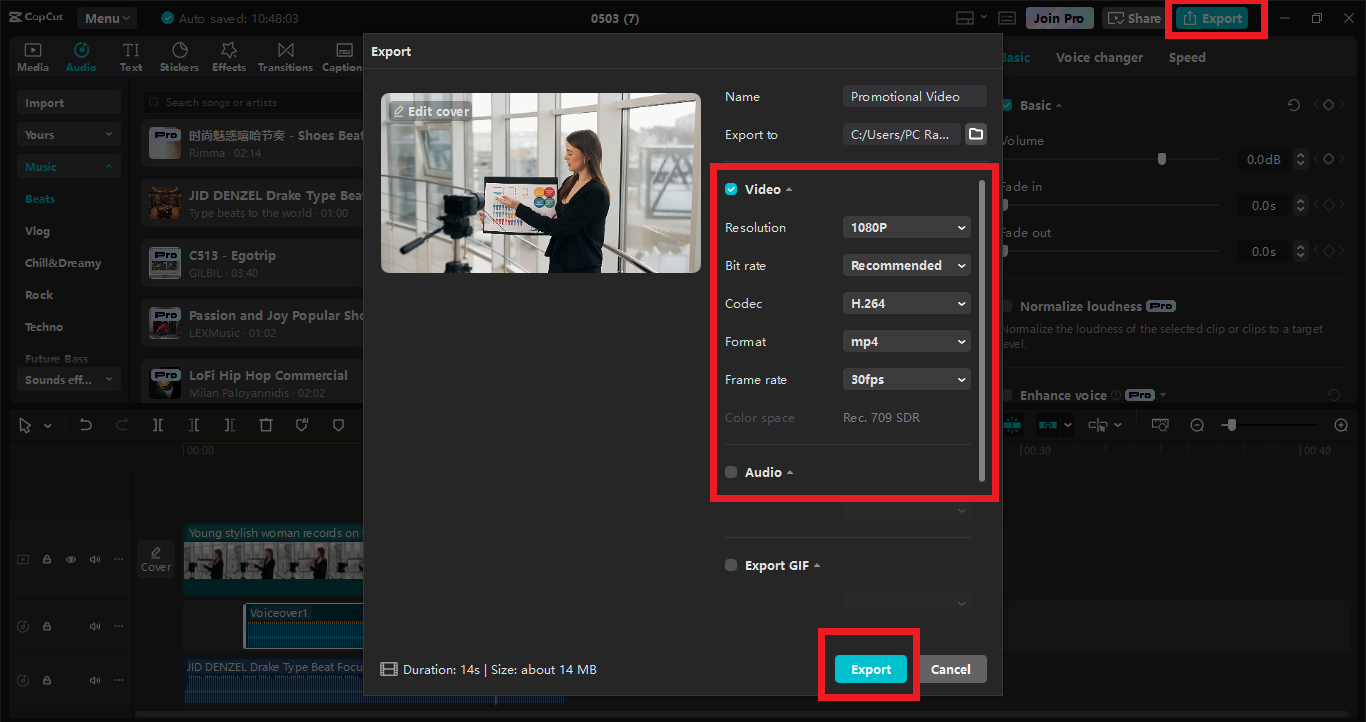
Step 5: Export and Share Your Video
Once you’re happy with your promo video, it’s time to export and share it with the world. Click “Export,” then choose your file name, destination folder, and output settings. For marketing videos, a resolution of 1080p is recommended to ensure high visual quality. Select MP4 as the format. A frame rate of 30fps is ideal, especially for business content.
Final Thoughts
Making a quality promotional video does not have to be complicated or expensive. With CapCut Desktop, companies now have access to professional-level editing software that makes the whole process, from importing video to final export, easier.

Login and write down your comment.
Login my OpenCart Account